How to Create a Blogsite
How to Create a Blogsite
Step-by-Step Guide on How to Create a Blogsite
Creating a blog is not that easy!
But, this is not that hard as what you think.
With proper guidelines, you can create your your first blog site.
Generally, you can start your first ever blog for free which means you will have a free domain.
However, a free domain name is not ideal if you want to have an authority with your website.
This is because a free domain name has limited functionality and you have no power on it once something happen in the future.
For example, in Blogger platform they offer free domain, but your domain will have an extension of “blogspot.com” like mydomain.blogspot.com compared with your own domain name.
So, make sure to have your own domain name to proceed.
How to Create a Blog with Blogger Platform
In this section, we will guide you on how to create your first ever blog for free with free web hosting Blogger platform.
Simply follow the step-by-step guide below.
1. Visit www.blogger.com or click here to start your first ever blog.
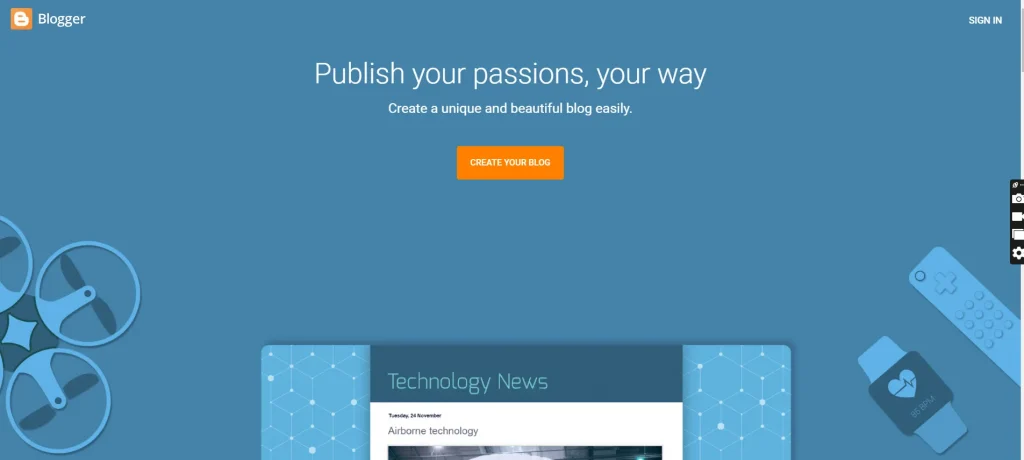
2. Next, as shown in the screenshot below, click “CREATE YOUR BLOG”.
3. Choose an Google or Gmail account to continue.
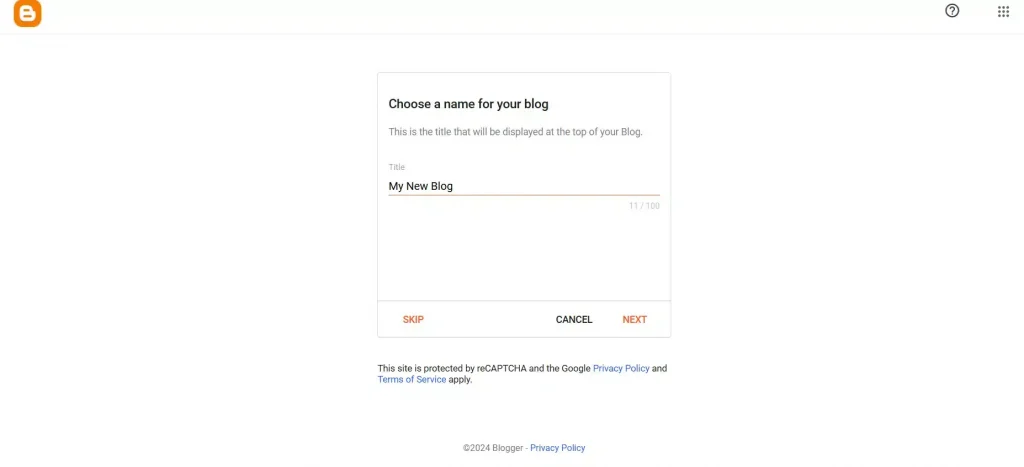
4. Then, as shown in the screenshot below, enter your first ever Title of your blog and click NEXT.
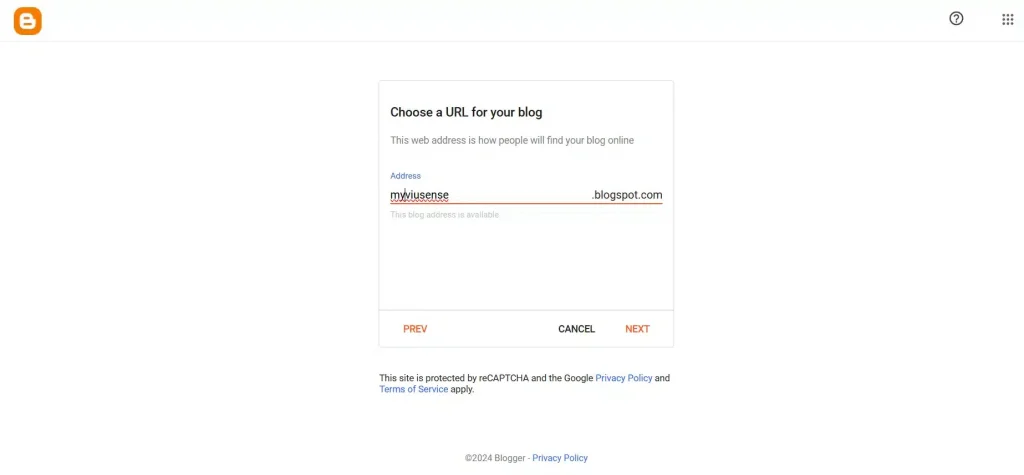
5. As shown in the screenshot below, enter your free domain then click NEXT.
For now, we will use this as our temporary domain as pre-requirement in creating a blog.
But, we will connect our own domain name or custom domain later.
6. Then, enter your display name and tap FINISH.
This serves as the author or the writer of the blog that you want to show to your audience.
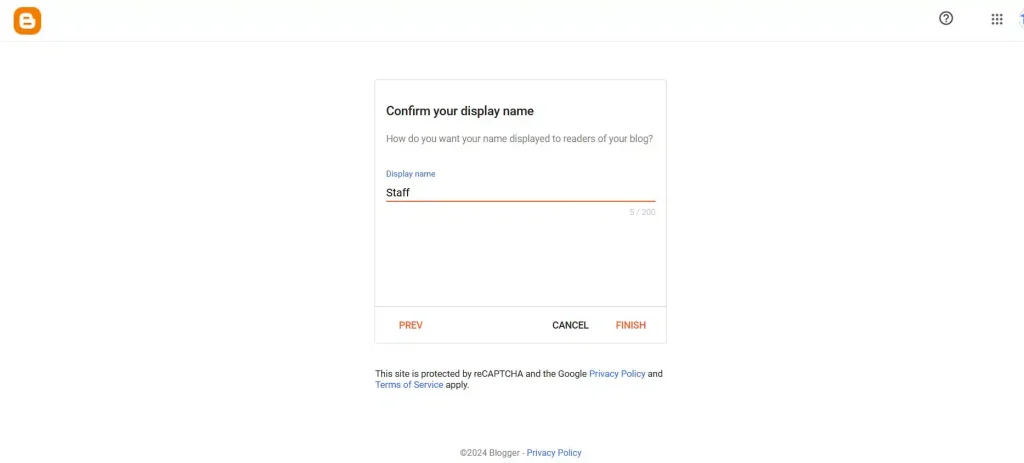
Congratulations for your first ever blog!
How to Connect Custom Domain Name with Blogger
In this section, we will guide you on how to connect your own domain name or custom domain with Blogger platform.
1. As shown in the screenshot below, that serves as our dashboard.
To connect our custom domain, just click the setting in your dashboard.
2. Then, under Publishing click “Custom domain”, enter your domain name, and click SAVE.
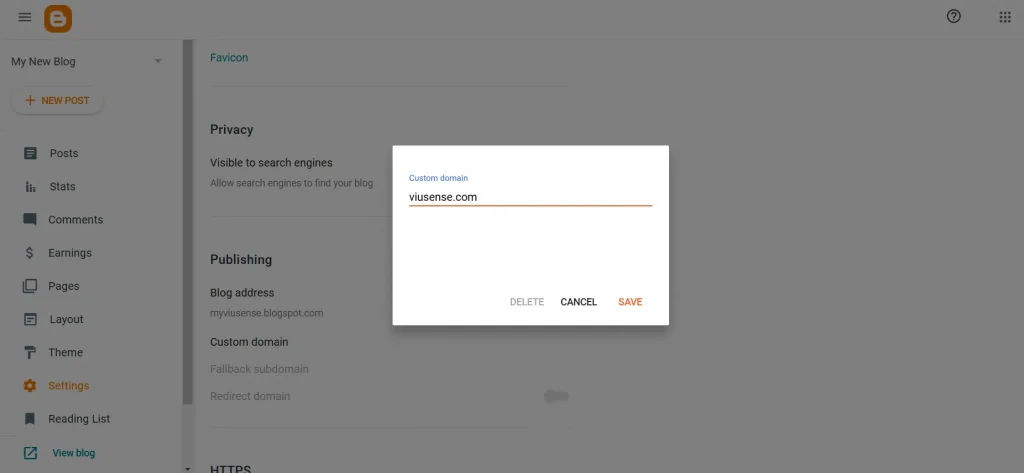
3. After that you will see a message like the screenshot below.
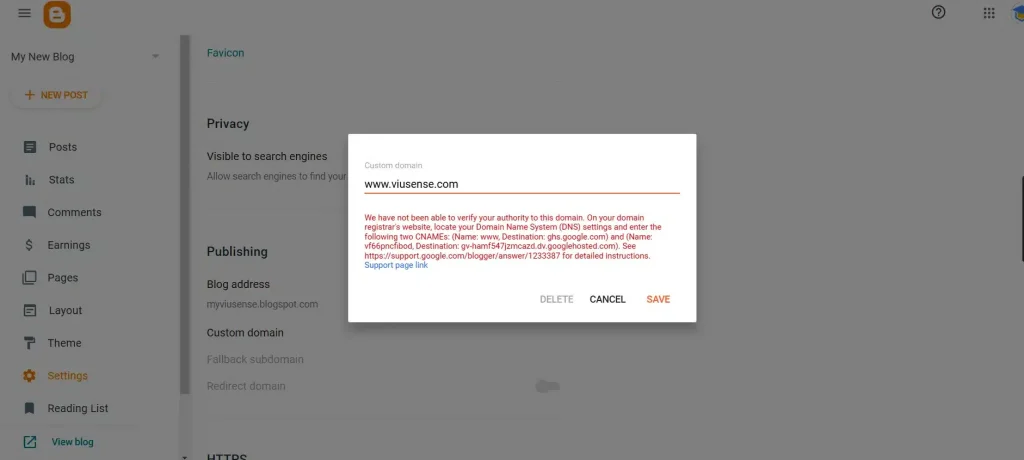
This message is to verify your authority on your domain.
4. To verify your domain authority, just go to your domain registrar.
This is where you bought your first ever custom domain.
So, based on the instructions, you need to create two CNAME records under your Domain Name System (DNS) setting.
If you bought your first domain on Namecheap, here is a full guide on how to connect your domain with Blogger platform.
Visit here How do I use my domain with my blogger account for the full guide.
If you bought your domain name on Hostinger, visit here How to point a domain to blogger for the full guide.
Note:
Following the above steps will help you create your first ever blog with Blogger platform.
How to Create a Blog with WordPress
This section will help you create your first ever blog with WordPress.
Generally, WordPress platform is free to use.
However, to use this, we need a hosting to host our website and install WordPress.
So, if you have your hosting already, you can start creating your first ever blog.
Different webhosting providers have different instructions on how to set up your domain so as to install WordPress.
Thus, we will just provide you helpful links on how to install WordPress depends on webhosting provider.
How to Install WordPress with Different Webhosting
If you are using Hostinger webhosting, you can set up your domain and install your first-ever WordPress blog here.
But, if you are using Namecheap, follow guides here.
However, if you are using GoDaddy, follow the instructions here.

